
If you're someone who doesn't like spending a good amount of time and effort on your nails, then this might not be something you want to try. It is however, super fun and cute! (I think everything is super fun and cute, but really, this is!)
Here's how mine turned out:

Here's what you'll need:
This is totally something you can customize with whatever colors you want, but you'll need at least 2 colors, plus black and white.
1. Base Coat (I used China Glaze Strong Adhesion Base Coat - $5.99 - Sally's Beauty Supply)
2. Two Colors (I used China Glaze in Shockingly Pink Neon - $5.99 - Sally's Beauty Supply, and Funky Fingers in Volts - $2.00 - Five Below)
3. Black Nail Polish (I used Sinful Colors in Black on Black - $1.99 - Drugstores)
4. White Nail Polish (I used Sinful Colors in Snow Me White - $1.99 - Drugstores)
5. Any Nail-Art Pen or Brush (I used Art Club Nail Art Lacquer - $2.00 - Five Below)
6. Top Coat (I used China Glaze Fast Foward Top Coat - $5.99 - Sally's Beauty Supply)
7. Q-Tips (to clean around the edges)
Step 1: Clean your nails and remove all nail polish using nail polish remover.
Step 2: Apply one coat of base coat.
Step 3: Okay, so the easiest way to do this is to create lines on your nail (horizontal, vertical, diagonal, etc.) with the colors you chose. After, you can go back and outline/accent with the black and white.
Ring Finger: I always start with my ring finger for some reason, I don't know why.

As you can see, the lines don't have to be perfect.
Using your nail art brush, dip it in either your black or white. According to however you want your design to be, outline and add a bunch of lines & dots!

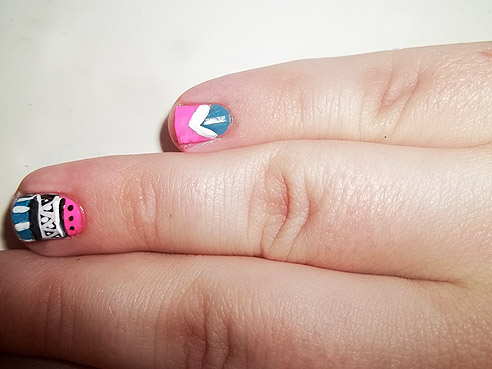
Middle Finger:


Pointer Finger:


Thumb and Pinky: I forgot to take pictures of them after, but just look up top! :)

Step 4: Apply one coat of top coat.
Have fun being tribal-y! ;)
No comments:
Post a Comment